Saturday, October 4, 2014

Sparkle with Prima - Lulupu Blog Hop

Hi All!


You must have reached my blog via Shilpa Nagaonkar's blog! Else please click HERE for the complete list of the hop stops or to start the hop from the top..

Welcome to day 2 of Lulupu "Sparkle with Prima" Blog hop! I am super excited to be a part of this month long celebrations organized by Lulupu team to celebrate all the Indian festivities with new Prima products now available at Lulupu Craft store.

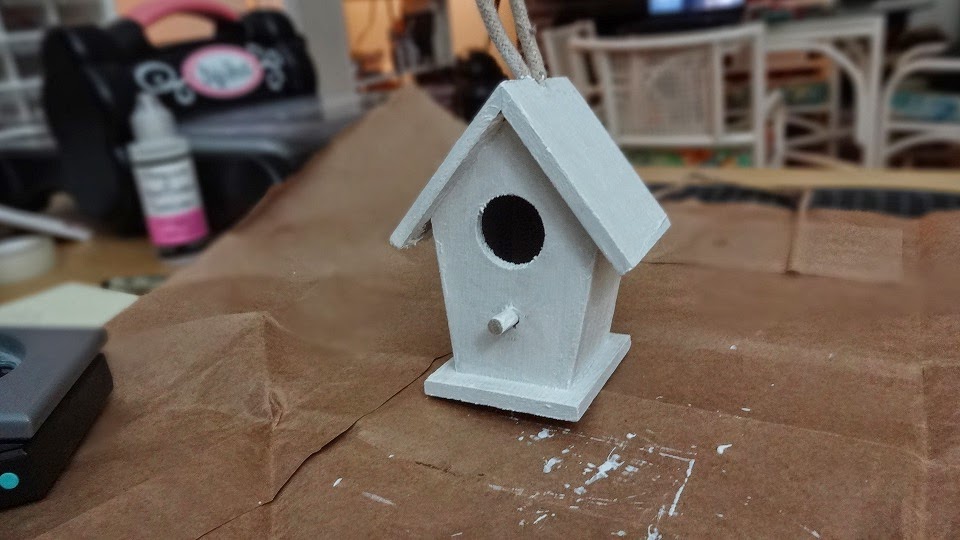
When Lulupu team invited me to be a part of the hop, I was super excited! I knew that this time, I have to move out of my comfort zone and try something new. I decided to alter this cute wooden bird house which I was hoarding for a long time!


I first coated the whole house with white Gesso to create the base..

Then I mixed pink perfect pearls from Lindy's Stamp Gang into Gesso as I wanted a pink shabby chic look..


This is how it looked after 2 coats (White base + Pink color coat)..


Now I started decorating the birdhouse.. First is the roof, I cut few 1 inches strips of prima paper pad..

Then I trimmed these down into the size of the birdhouse's roof.. I used my scallop edge punch and distressed the edges with Walnut stain distress ink..


I carefully glued these strips on top of each other to create a typical roof structure.. I seriously loved the final outcome of this step..


I used some Prima vines to give it a birdhouse in the garden look.. :D :D


After adding vines, I used some flowers, rhinestones, pearls and a hello diecut from my stash to complete the project..  Simply in love with the shabby chic look of this birdhouse..


Here is the complete look of the project in better lights and setup.. :)


I also brushed vines and flowers with pink Gesso I made to give it a more worn out look and blend in the embellishments together..


I hope you guys will like this project.. Do leave some love as it makes me super happy!

and don't forget to play along the hop and the challenge.. you can find all the details here.. your next  stop will be Pallavi Iyer.. A super talented crafter!

Have a good day!
- Priya  

Wednesday, September 3, 2014

Winnie & Walter "Share the love - Simon Says Stamp' Part 1

Hello friends,

Recently, i got a chance to shop at Simon Says Stamp that carries all of the products from every card maker's wishlist. When I saw that Winnie & Walter is Featuring SSS products, I was sure that I will cook up something as I bought my very first W&W stamp set. I am simply amazed with the quality of W&W stamps and the solid impressions they give.


I hope I will be able to participate in their all 5 challenges. That's why I have ended my blog post name with "Part 1". :D I have made 2 cards so far that fits into their 3 challenges. Wish me luck!

I will share both cards here as these are kind of inter-related. I will tell you how.

I have never created any card with Rainbow color palette. This is my first try with all the rainbow colors. I used various distress inks to create the rainbow colored Mosaic heart.

As they say you learn from your mistakes. But here I learnt from my messy craft table. My initial plan was to pop out the butterfly out of stenciled heart. But stupid me, I placed the colored heart panel after die cutting SSS Paulina butterfly on misted distress inks which I kept to create another card. The water seeped into CS and spoiled the right side of the heart. Either I could throw the panel into dustbin or use some creativity. I went for second option and I loved the outcome.. :D

1st Card : I cutout the right side of the card which was spoiled and came up with the below card. Backed the panel with the PTI dotted Pattern Paper.Covered the butterfly window with the equally sized SSS Devonshire Butterfly. Added the bold and beautiful sentiment from W&W "The big, the bold and You" stamp set. Lovely!


2nd Card : Since my rainbow mosaic butterfly die cut was ready, I was able to quickly whip up my second card. Die cut the Paulina Butterfly 2-3 times and glued these together and adhered on Kraft CS. The sentiment was heat embossed and needless to say, it's from the W&W "The big, the bold and You" stamp set. I kept it simple so that the focus is on the butterfly.


I also covered the mosaic tiles with Glossy Accents to make the butterfly shine! Here is a close up..


Supplies Used :

Stamps : Winnie &Walter  "The big, the bold and You" stamp set
Cutting dies: Simon Says Stamp Devonshire and Pauline Butterfly
Stencils : Simon Says Stamp Mosaic Heart
Card Stock : PTI Perfect match Cardstock Sampler

Challenges Entered :
Card 1:
1. Winnie & Walter - Rainbow Colors with SSS Products
2. Simon Says Stamp - Wednesday Challenge - Anything Goes
3. Scrap it Girl - Monthly Challenge - Stencils or Masks

Card 2:
1. Winnie & Walter - Rainbow Colors with SSS Products
2. Winnie & Walter - 10 Minutes Dash Challenge with SSS Products
3. Simon Says Stamp - Wednesday Challenge - Anything Goes
4. Scrap it Girl - Monthly Challenge - Stencils or Masks
5. Daring Card Makers - Clean & Simple

Sorry for the long post but I wanted to share my craft story and the feeling of accomplishment I felt with the end results.

Have a good one!

- Priya

Double Stencling!

Hi All,

Quickly sharing the card I made made using my stuff from Simon Says Stamp and Mama Elephant. This is a quick card I made in 10 mins flat. Seriously, I think this the quickest card i ever whipped up!

I used the tiny hearts stencil first and used various distress inks to create the heart background. Then I used the balloon stencil and lightly inked the stencil so that the background sees through. Love the bunch of overlapping balloons.


Supplies Used:

CardStock : PTI Perfect Match CS Sample, Neenah White
Distress Inks : Picked Raspberry, Peacock Feathers and Mustered Seeds
Stencils : SSS Balloons and Patterns
Stamps : Mama Elephant Make a Wish
Others : Recollection Enamel Dots

Entering the card to following Challenges :

1. Simon Says Stamp - Wednesday Challenge - Anything Goes
2. Simon Says Stamp - Work it Wednesday

Have a great day!

- Priya